Pump up the Pi
Migrating to a larger microSd Card, C_LOG_15
December 14, 2015In my pi adventures I think it is time to swap out to a larger microSd card. I was able to pick up a class 10 32gb microSd card for about $12 dollars.
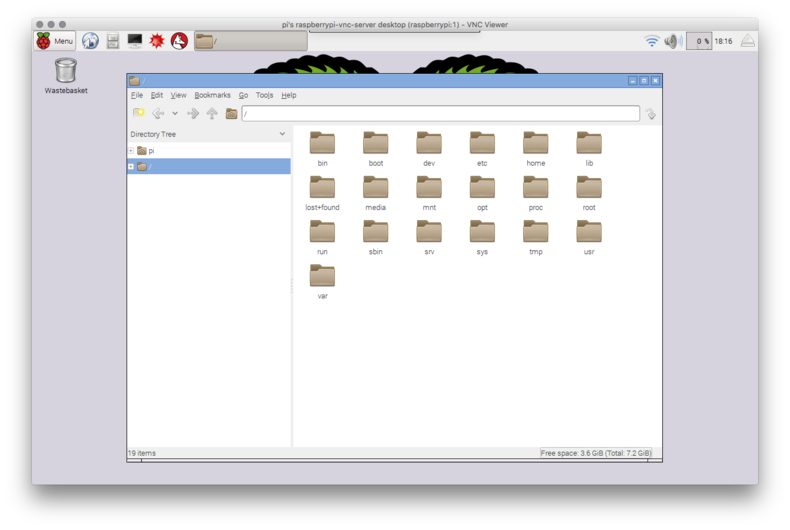
Before

about 3.6gb free on the stock sd card that was in my kit
Since I am late to this game off to google to find a suitable guide. This describes everything I would ever need to do so let's get started and go about the steps.
First we need to find the location of the sd card.
diskutil list
/dev/disk0 (internal, physical):
   #:                       TYPE NAME                    SIZE       IDENTIFIER
   0:      GUID_partition_scheme                        *251.0 GB   disk0
   1:                        EFI EFI                     209.7 MB   disk0s1
   2:                  Apple_HFS Mac HD                  250.1 GB   disk0s2
   3:                 Apple_Boot Recovery HD             650.0 MB   disk0s3
/dev/disk1 (internal, physical):
   #:                       TYPE NAME                    SIZE       IDENTIFIER
   0:      GUID_partition_scheme                        *2.0 TB     disk1
   1:                        EFI EFI                     209.7 MB   disk1s1
   2:                  Apple_HFS iMac Data               2.0 TB     disk1s2
/dev/disk2 (internal, physical):
   #:                       TYPE NAME                    SIZE       IDENTIFIER
   0:     FDisk_partition_scheme                        *8.0 GB     disk2
   1:             Windows_FAT_32 boot                    62.9 MB    disk2s1
   2:                      Linux                         7.9 GB     disk2s2
We use again the dd command but this time to create an image.
sudo dd if=/dev/disk2 of=~/Desktop/raspberrypi.dmg bs=5m
the bs flag was discovered in the comments, further research on the topic
also your can use ctrl-t to see the progress
77+0 records in
77+0 records out
403701760 bytes transferred in 82.862502 secs (4871948 bytes/sec)
After about 25minutes it completes we will do the reverse which is similar to what we did to get the OS on the card initially but now it is from an image we just created.
We have to unmount the disk using diskutil unmountDisk /dev/disk2 (If you get this device is currently busy you need to unmount the disk) then you can run the command sudo dd if=~/Desktop/raspberrypi.dmg of=/dev/disk2 bs=5m to start the transfer to the sd card.
load: 1.31  cmd: dd 986 uninterruptible 0.00u 0.09s
2+0 records in
1+0 records out
5242880 bytes transferred in 3.542337 secs (1480062 bytes/sec)
Another 25minutes later we have a copy of our original sd card but now on our 32gb card. I plugged it back in and it booted up immediately.
On first boot you might see we still have 3.6gb free. We can fix that by loading up the Raspberry Pi configuration tool (Menu -> Preferences -> Raspberry Pi Configuration) and click on the expand filesystem button. This will expand the partition to use the full size of the sd card.

Reboot your pi and once it comes back up you should have access to the full size of your micro sd card.
After

about 24.7gb free on the new micro sd card
Mental recap
- The process was familiar like we did from the initial OS load
- The transfer rate on the iMac to the sd card seems painfully slow.
Cover image credit: http://facebook.com/RodrigoMoraesPhotography
